Being viewed

Thursday, March 31, 2011

How to Format your PC and install new OS? Do this steps...


1. Open your computer and open you cd/dvd rom and put in your bootable cd/dvd of your chosen operating system, then restart your computer. 


2. While the computer reboots, you will see this image on your screen.


3. Press any key or Enter, spacebar, or anything you like, then wait (you will see this message "setup is inspecting your system configuration..."), don't do anything until it comes to this page: (Windows Setup, setup is loading files page )


4. Wait until loading of files is finished.

5. A page will appear that looks like this, then press ENTER to continue.


6. EULA (end-user license agreement) page will appear then press F8 to agree and continue the setup.


7. A page will appear that displays the existing operating system installed on your pc, then press ENTER as stated below to continue setup.
8. The screen will show the different partitions on your computer and it will look like the image below, highlight the partition named C: by following the instructions below the screen on how to select an option, then again press ENTER to setup windows on the selected partition.


9. There will be four options that will be displayed, choose FORMAT THE PARTITION USING NTFS FILE SYSTEM or you can choose the first option FORMAT THE PARTITION USING NTFS FILE SYSTEM (QUICK), then press ENTER again to continue setup.


10. Then wait until setup formats the partition.


11. After formatting, wait again until setup finishes copying files to windows folders, this may take minutes.


12. After copying of files, the setup will now reboot to continue the installation, wait 15 seconds and it will automatically reboot, or press ENTER if you can not wait 15 seconds.


13. The computer will reboot and wait until setups continues, you will see the image below and wait for about 30 to 45 minutes for setup to finish installation.


14. You have now successfully formatted your computer and a fresh copy of windows is installed.


Tuesday, March 29, 2011

How to make or build a coin operated PC


These coin operated computers are not that hard to make since you only need a few materials and attach a few wires to make it work. I think you don't have to be a computer engineer or an electronic expert to build your own coin operated desktop computer. However, I would highly advice that you consult someone knowledgeable about electronics since this tutorial is not thoroughly detailed. Google is your friend to find more information about this.


I'm sorry for not able to supplement you with more detailed tutorial on this post but I do have some pictures that may help you.


To start making your own coin operated computer, here are some materials that you're going to need.


1. Coin Slot which will cost you around 200 - 300 Pesos. There's an expensive one that cost about 600 pesos but I tell you, they're all just the same because I have both tested the expensive and the cheaper one. I think you should go for the cheaper one.


2. Wire - at least buy 1 mtr of wire. You'll use this to connect your coin slot to the timer.


3. Relay - just go to the electronic store and tell them that you're buying a relay for your coin operated computer. They know about this.


4. Two diodes - you can ask which diode you'll need in the store.


5. Capacitor


6. 9v-12v Transformer


7. Timer


8. Power cable that connects to your monitor.


Please ask the electronic store about some detailed infos of those materials.


Those are basically what you need to create your own coin operated computer machine. Now the succeeding pictures may not be clear but I'll try to explain them to you guys.


The diodes, capacitor and transformer are connected. You'll notice in the picture that the capacitor's gray color stripe are facing towards the transformer. You'll also notice that the transformers 1 AMP text are facing towards the capacitors gray colored vertical line.

Checkout the diodes, how they are connected, you'll notice that the wire where you'll see a gray colored head are connected on the opposite side of the capacitor wire.

That's basically how you connect the transformer, diodes and capacitor.

Moving down, the image you see is how you connect it from the transformer to the timer board. Check it out.


Try to analyze a few of how its being connected - the brown and the black wires are basically attached to the timer board.


The pictures you see above is actually the back and the front portion of the timer board. On the first picture above, take a look how the wires are placed and soldered. At the bottom or the front portion, you'll see how the relay is attached and the wires are connected. This is now ready to connect to your coin slot device which also has some wires that you should connect.


The power cable are stripped off using a knife then attached the wires that goes from the relay part as you've seen on the previous pictures - this is where the power is cut off that supplies the monitor when the timer stops.

Finally, below is a picture how all of these are connected.


I hope these gives you an idea on how to create your own coin slot operated computer or computers that works using coin slot. It only basically cut off the power supply to the monitor.

Again I'm sorry for not able to give you a more detailed tutorial on this matter but I do hope you could find something similar to these topic but more thorough. If you happen to find it, please don't forget to share it in here.

Feel free to post your questions on the comment box below.

New Images Updated: I have added new photos that hopefully will help you more on how to build your own coin operated computer. Please don't forget to subscribe to my blog or share it to your friends.


Monday, March 7, 2011

Jailbreak using Sn0wbreeze 2


Congratulations, you can jailbreak using sn0wbreeze 2 (Windows users only)! This jailbreak is one of the few methods that supports most of the older devices, but there are several considerations before using. Please confirm that your device and firmware are compatible with this before proceeding. Instructions and


iSmart


iSmart Dialer claims to completely change the way you use your dialer, and it does, though I'm not sure in the way they were hoping. It features a robust settings menu that gives you some flexibility in the way the app works, but like many Cydia apps, the features are poorly explained, leaving the user to test them via trial and error, which can be frustrating.
Once you've activated the trial, you can see it work immediately by opening the dialer and trying to place a


Video Lock for iPhone/iPad

 ‘Video Lock for iPhone - Lock Your Moment’. This app is matched to people who like to record funny videos, pranks, very romantic moments, or whatever you want to keep it secretly by using passcode. There are two passcodes using for a real one and decoy one. Example, you set your real passcode as “lock’, but if you key the real passcord backward ‘kcol’, it will access to the other page which is a decoy page, so you can hide anything in it. See! This part is a very creative and 


Sunday, March 6, 2011

Jailbreak using Redsn0w 0.9.4


Congratulations, you can jailbreak using redsn0w 0.9.4. This method is slightly more difficult than some of the newer methods, however it maintains compatibility with a lot of older devices and firmware. If there is another method available to you we recommend trying that first.


Jailbreak using Redsn0w 0.9.6b2


Congratulations, you can jailbreak using redsn0w 0.9.6. This method may not be as easy as some of the other methods, so if you have any other jailbreak methods available we recommend you attempt those


jailbroken using PwnageTool


Congratulations your device can be jailbroken using PwnageTool (for Mac OS X users only). This is a  safe and recommended jailbreak if you own one of the compatible devices. Full instructions and


Saturday, March 5, 2011

Jailbreak using Limera1n


While JailbreakMe.com may be the easiest method to Jailbreak, it doesn’t work with 4.1 firmware. You can use Limera1n to jailbreak 4.1 devices and it’s almost as easy. 

  1. Download the Limera1n installer from the source link below
  2. Connect your iOS device to your computer
  3. Launch the Limera1n program. You may have to run the program as Admin in Windows
  4. Click “make it ra1n”
  5. Now you must put the device into DFU mode. To do this, hold down the Home and Power button to 5-7 seconds. Then, release the Power button, and continue to hold the Home button for an additional 10 seconds or so. Don’t worry if iTunes pops up.
  6. That’s it! You’ll see a new Limera1n icon on your home screen, which will allow you to download Cydia, which you’ll need to grab jailbreak apps. 

Downloads


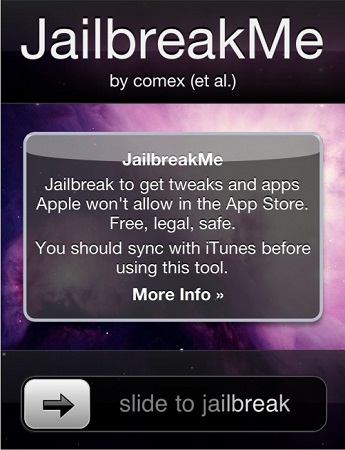
Jailbreak using JailbreakMe.com


JailbreakMe.com is the easiest way to jailbreak your iOS device, but it only supports software version 4.0.1


Jailbreak using Blackra1n


Congratulations your device can be jailbroken using blackra1n. This is an very easy jailbreak method and works for Mac and Windows users. Please read all instructions carefully and make sure you do your


Friday, March 4, 2011

Jailbreak Using Absinthe


Step 1Download Absinthe from here (Mac) or here (Windows), extract it, than run it.


Jailbreak using Greenp0ison


Congratulations, your device can be jailbroken using the greenp0ison jailbreak method. Here are instructions for the jailbreak:


Thursday, March 3, 2011

What is Jailbreaking?

So you’ve got your hands on your shiny new iDevice but what now? You see references to ‘jailbreaking’. But what, you may ask is jailbreaking?
Jailbreaking is a process of unlocking iOS in order for you to gain root access to the UNIX file system


Wednesday, March 2, 2011

Jailbreaking FAQ


Why Should I Jailbreak my device?
Jailbreaking an Apple device allows a user to modify and edit certain parts of the device that are normally not customizable. With Jailbreaking you can customize your device beyond what Apple permits


How to Factory Reset / Restore a Jailbroken iPhone


Many people are concerned that once they jailbreak their phone they won't be able to get warranty service or fix a problem if something goes wrong. Fortunately, there is almost always a way to bring your phone back to a completely factory state -- and from there you can get help fixing your device.


Tuesday, March 1, 2011

RecognizeMe


Ever since the release of Samsung’s Galaxy Nexus, I, along with many other iOS users, have been anxiously waiting for something similar to the facial recognition unlock feature that the Android


How to Use Cydia to Download and Install Apps


One of the main reasons you have Jailbroken your iOS device is most likely to install apps from the Cydia app store. In this guide we will showcase how to browse for and install applications from Cydia.